SL:Introduction: Unterschied zwischen den Versionen
imported>Burghardt |
imported>Burghardt |
||
| Zeile 1: | Zeile 1: | ||
| − | |||
== Nodes Hardware == |
== Nodes Hardware == |
||
| Zeile 89: | Zeile 88: | ||
| − | |||
| − | == Room 1.102 == |
||
| − | === Hardware === |
||
| − | * ... |
||
| − | |||
| − | === Storage === |
||
| − | We have: |
||
| − | ==== a user named <code>sensorlab</code> ==== |
||
| − | sensorlab@login:~$ id |
||
| − | uid=13433(sensorlab) gid=913(tmg) groups=913(tmg),6172(senslab),1093888628(AfsPag-336a74) |
||
| − | |||
| − | ==== a ''group'' named <code>senslab</code> ==== |
||
| − | dn: cn=senslab,ou=groups,dc=informatik,dc=uni-goettingen,dc=de |
||
| − | ... |
||
| − | memberUid: sensorlab |
||
| − | memberUid: ashah |
||
| − | memberUid: oalfandi |
||
| − | memberUid: brosenne |
||
| − | memberUid: kellner |
||
| − | |||
| − | This list may get extended with userids of students on request... |
||
| − | |||
| − | ==== the user has a home directory ~sensorlab ==== |
||
| − | sensorlab@login:~$ pwd |
||
| − | /afs/informatik.uni-goettingen.de/user/s/sensorlab |
||
| − | |||
| − | ==== obligatory home page ==== |
||
| − | http://user.informatik.uni-goettingen.de/~sensorlab/ |
||
| − | |||
| − | The account "sensorlab" should '''not''' be used by any member of the group "senslab". Instead use your own account - that's what group membership is for! |
||
== See also == |
== See also == |
||
Version vom 23. Oktober 2012, 09:27 Uhr
Nodes Hardware
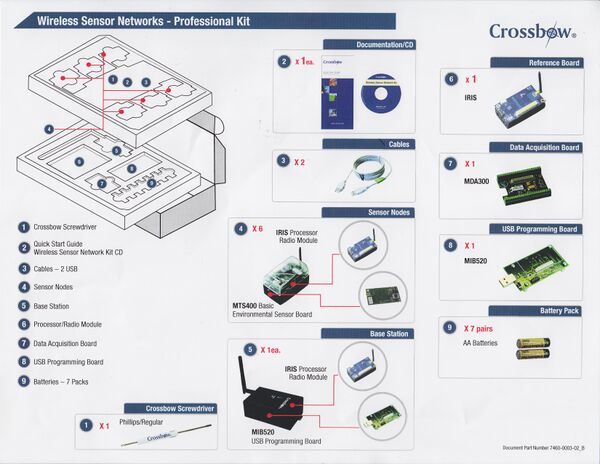
The sensor nodes we have ordered are from Crossbow technology (http://www.xbow.com/Products/productdetails.aspx?sid=264) Basically, the sensors operate in 2.4GHz ISM band. The range of the radio module is about up to 50 m indoor and up to 300 m outdoor.
For more details see the data sheet: http://www.xbow.com/Products/Product_pdf_files/Wireless_pdf/IRIS_Datasheet.pdf
Sensor board: MTS400 including the following sensors
- Dual-axis Accelerometer: Analog Devices ADXL202JE
- Barometric Pressure Sensor: Intersema MS5534AM
- Ambient Light Sensor: TAOS TSL2550D
- Relative Humidity & Temperature Sensor: Sensirion SHT11
Documents
TinyOS
General documents can be found on http://docs.tinyos.net/index.php/Main_Page
TinyOS Iris API: http://www.tinyos.net/tinyos-2.1.0/doc/nesdoc/iris/
How To
How To Disassemble a Sensor Node to Reprogram it (.pdf) (.doc)
Modifications for iris motes
PacketParrot application
The PacketParrot application which is provided with TinyOS does not work on directly on the Iris motes. Thus, the following modified version can be used instead. The modifications are basically replacing the special radio component, which is used for sending and receiving, by the generic AMSenderC and AMReceiverC components.
Installation
Debian
Install TinyOS 2.1 in Debian (lenny)
VMWare
login to the set up computer
 user: wsn
 password: tinyos
start Xubuntos in VMWare-Player
 user: xubuntos
 password: tinyos
Test
Note: the motelist command does not show any connected motes (I think it is because of that the hardware is very new and therefore cannot be recognised)
To find out which usb device to use, just connect the node and use the dmesg command.
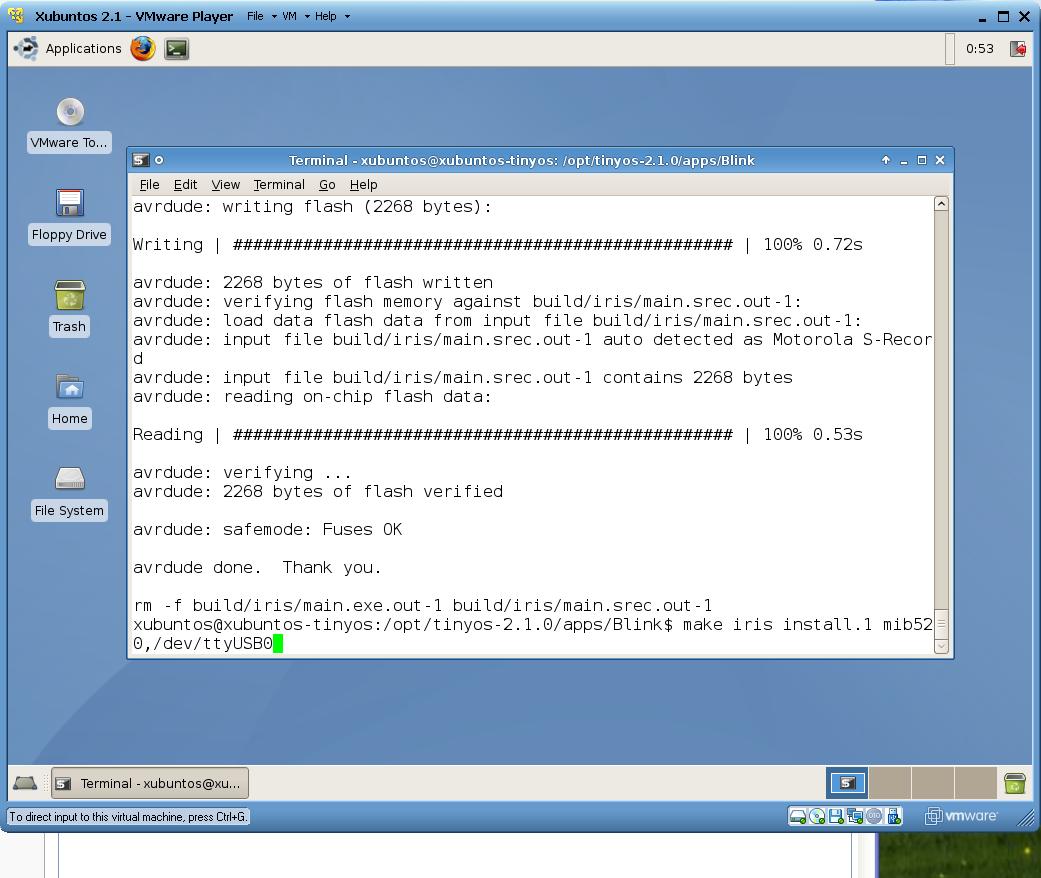
Transfer test application Blink to the node attached via USB
 cd /opt/tinyos-2.1.0/apps/Blink
 make iris install.1 mib520,/dev/ttyUSB0
Manuals (CD KIT)
CD Documents and Manuals
Media:MEP_SYS_Users_Manual_7430-0411-02_A.pdf
Media:MoteConfig_Users_Manual_7430-0112-01_A.pdf
Media:MoteView_Users_Manual_7430-0008-05_A.pdf
Media:MoteWorks_Getting_Started_Guide_7430-0102-01_D.pdf
Media:MPR-MIB_Series_Users_Manual_7430-0021-08_A.pdf
Media:MTS-MDA_Series_Users_Manual_7430-0020-05_A.pdf
Media:TinyOS-nesC_Reference_Manual.pdf
Media:WSN_Quick_Start_Guide.pdf
Media:XMesh_Users_Manual_7430-0108-01_C.pdf
Media:XServe_Users_Manual_7430-0111-01_D.pdf
See also
- SL:tmg94 -- ESXi Server for hosting Virtual Machines
- SL:Virtual Machines
- SL:Remote Access -- reach in from the outside world
- SL:Topology -- the network address ranges, machine names...
- SL:Network_Users

